September 25, 2018

Revit: 2018.3, Windows 10 and No Material Browser

I discovered today that I was not able to open the Revit® Material Browser (on the Manage ribbon tab, on the Settings panel, selecting the Materials tool). As luck would have it, I am quite a bit behind in reading the Autodesk Revit Architecture Forum, and I just happened to have read a thread about this issue earlier today. In the Materials Dialog Box Doesn't work thread, a post by richard.horner, building off the previous post by stewart.jex, provided the solution that worked for me. I know I will not be able to find that thread when I need it in the future, and since the solution is not at all intuitive (I still cannot figure out why it works), I decided to document it here.

  1. In the Revit session in which you discover that the Material Browser will not open, go to the Application Menu (File "tab"), and choose Options.
  2. In the Options dialog, choose Hardware on the left side.
  3. On the right side, in the Hardware setup area, clear the checkmark from the Use hardware acceleration (Direct3D®) toggle.
  4. Select OK to ratify the change and close the Options dialog, and then close Revit. (Changes to hardware acceleration do not take effect immediately.)
  5. Restart Revit, and open a project file.
  6. On the Manage ribbon tab, on the Settings panel, select the Materials tool. The dialog opens! (Great, but who wants to run Revit without hardware acceleration, right? The next part is the bit that I cannot figure out.)
  7. Close the Material Browser.
  8. Open the Options dialog again, select Hardware and select the Use hardware acceleration (Direct3D®) toggle to re-enable it. There should be a checkmark in the toggle.
  9. Select OK to ratify the change and close the Options dialog, and then close Revit.
  10. Restart Revit, open a project file and then try to open the Material Browser again. It works!

While the analytical part of my brain wants to know why the exact same settings that previously failed now work, the "hey, you found a solution, now lets get on with what you were trying to do originally" part of my brain is declaring victory and moving on. And I will be carefully looking both ways crossing streets on my way home this evening, as I have clearly used my luck for the day.

September 12, 2018

Dynamo: Sorting a List of Lists by a Value in the Sub-List in Python

I had a list that was composed of sub-lists, each sublist contained a Sheet Object and the values of three parameters associated with that Sheet, including the Sheet Number. I wanted to be able to sort the sub-lists in ascending order of the Sheet Number value in each sublist. I found the following Python code does the job:
sortedLists = sorted(listOfLists, key=lambda x: x[index])
where index is the index of the item in the sub-list on which you want to do the sorting.

For example, given a list with four sublists, similar to that in the image below,
where the index of the Sheet Number in each list is 1, the code below
will sort the sub-lists by the item in index 1 of each sub-list, with a result of

This page on the stackoverflow website helped me work this out. Two additional notes:
  • If you want to replace the original list with the sorted list, you can use this syntax:

    listOfLists.sort(key=lambda x: x[index]).

  • If you want to sort in descending order, add reverse=true as a parameter:

    sortedLists = sorted(listOfLists, key=lambda x: x[index], reverse = true)

    or

    listOfLists.sort(key=lambda x: x[index], reverse = true).

September 01, 2018

Dynamo: Export Views and Sheets from Revit - Part 3

First post in this series [Part 1]
Previous post in this series [Part 2]

This post describes the nodes used to separate the Views from the Sheets that were obtained from the ViewSheetSet that the user specified as the source of Views and/or Sheets to be exported. This Dyanmo graph generates file names for the exported Views/Sheets. In order to be able to use the Sheet Number in the file name of exported Sheets, Views and Sheets need to be processed separately when generating the file names as Views do not have a Sheet Number parameter, so that cannot be part of the name generation code for Views. Separating the Views from the Sheets in two separate lists and processing each list separately when generating the file name seemed like the easiest way to handle that.

As noted in Part 2, the Python Script 1 node generates a list of View and Sheet objects, based on those included in the ViewSheetSet specified by the user. In order to separate that list into two separate lists, the List.FilterByBoolMask node is used. That requires a Boolean Mask, which is a list of true and 
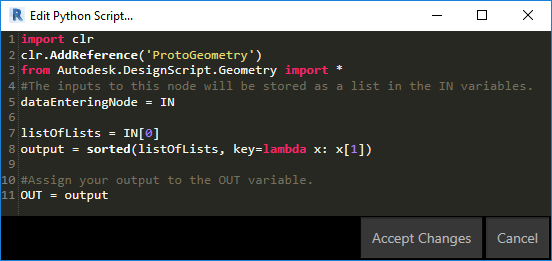
false values. Items in the original list whose index corresponds to a true in the Mask list end up in the "in" output list. Those that correspond to false become part of the "out" list. The nodes in the lower left corner of the image above generate the Boolean Mask:
  • The list of Views/Sheets in the Set are fed into the "element" input of a Element.GetParameterValueByName node.
  • A String node provides the input to the "parameterName" input, with a value of "Category".
  • This creates a list of category objects, representing the category of the items in the View/Sheet list.
  • That list of categories is converted to a list of strings, representing the name of each category by the Element.Name node.
  • This list of strings is then passed to the Equal x to y? operator node (==), as the "x" input.
  • The "y" input is provided by a String node, with the value "Views".
  • The output will be a list of true/false values, based on whether the category name is "Views". Any Views on the original list will have a true value, and any Sheets will have a false value on that list.
Feeding the original list of Views/Sheets into the "list" input of the List.FilterByBoolMask node and the Bool Mask we just created above into the "mask" node will send the Views to the "in" output and the Sheets to the "out" output. These are sent to the respective file name generation nodes, to be covered in the next post in this series.

But before closing, there are two additional nodes in the blue node group in the image above. Eventually, we need to export the Views and/or Sheets, so we need to recombine the separated lists. I chose to put the Views first and the Sheets second, and used a List.Create node to combine the two. The List Create node will generate a list with two sublists, one of the Views and one of the Sheets. I just want a single combined list, which the Flatten node creates.

Note also that it is perfectly acceptable for the ViewSheetSet to have only Views or only Sheets. The nodes above will still generate two separate lists; one will just be empty.

Next post in this series [Part 4]