For a enthusiast's view of the Ribbon, take a look at Robin Capper's blog article on the Ribbon in AutoCAD Architecture 2010, and keep an eye out for future installments.
Home Tab
Here is what you should find on the Home tab of the AutoCAD Architeture 2010 Ribbon. The images and descriptions posted here are based on the final beta version; it is possible that there could have been some changes made prior to the release of the shipping version. As always, you can click on any reduced-size image to see a full-size version. Use the Back button in your Browser to return here.
 Build Panel
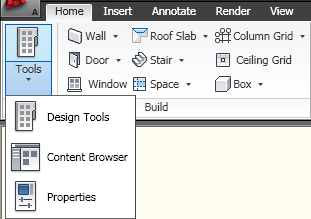
The Build Panel contains commands related to the creation of AEC objects. Note that a down arrow icon indicates that there is a flyout associated with a particular panel or command button. When you hover over a command button that has a down arrow, you will see two "zones" - one with the icon, and the arrow (the background will be darker in the zone over which your cursor is at the moment). Left clicking on the icon will execute that command; left clicking on the arrow will activate the flyout, giving access to the "main" command and additional, related commands. Hovering will display tooltips, if you have those activated, which I would highly recommend, at least until you learn the new icons. For example, the Tools command button at the left of the Build panel displays the Design Tools icon. Selecting that will open the Tool palettes, if closed, and set the Design Tool Palette Group active, if you have a group so named. Selecting the arrow portion displays the following flyout, which also allows you to open Content Browser or the Properties palette, in addition to the Design Tools command.
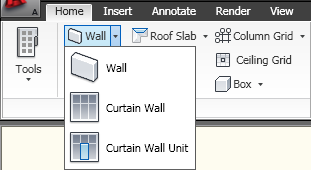
 The Wall command button provides access to the WallAdd (main), CurtainWallAdd and CurtainWallUnitAdd commands.
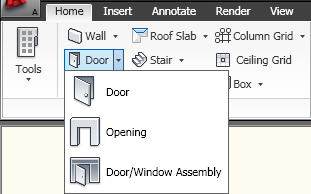
 The Door command button provides access to the DoorAdd (main), OpeningAdd and DoorWinAssemblyAdd commands.
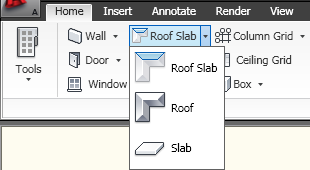
 The Window command button does not have a flyout, but does allow you to start the WindowAdd command. The Roof Slab command button provides access to the RoofSlabAdd (main), RoofAdd and SlabAdd commands.
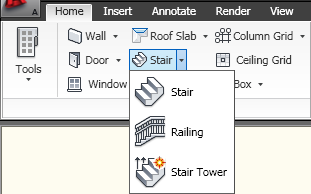
 The Stair command button provides access to the StairAdd (main), RailingAdd and StairTowerGenerate commands. That last one requires that you be using the Drawing Management system (Project Browser/Project Navigator) and have a project set current.
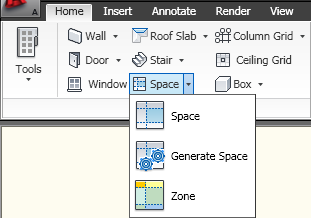
 The Space command button provides access to the SpaceAdd (main), SpaceAdd, using the Generate option and ZoneAdd commands.
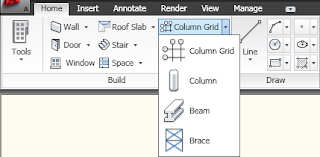
 The Column Grid command button provides access to the ColumnGridAdd (main), ColumnAdd, BeamAdd and BraceAdd commands.
 The Ceiling Grid command button does not have a flyout, but does provide access to the CeilingGridAdd command. Do not forget you need to be in a Display Configuration that has the display of ceiling grids turned on for the current view direction to see the results of this command. The Box command button provides access to the MassElementAdd command, with the BOx option chosen. The flyout provides access to all of the other Mass Element options, except for the Doric and Freeform options (which can be chosen from the Properties palette after excuting any of the other options from the Ribbon), and the DrapeAdd command.
 Draw Panel
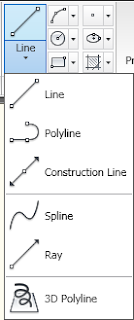
The Draw Panel provides access to the AutoCAD drawing commands that you would have found on the Shapes toolbar in previous releases. One thing to note: The Line button icon, like all of the flyout buttons in the Build panel, will not change if you choose one of the flyout options, but all of the other buttons will change to whatever command you last chose (like a toolbar flyout used to do). The Line command panel provides access to the Line (main), Pline, ConstructionLine, Spline, Ray and 3dpoly commands.
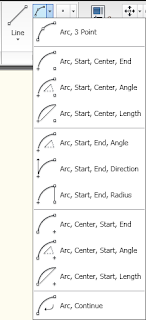
 The Arc command button provides access to the various ways to specify an arc, with the 3-point method being the initial icon option.
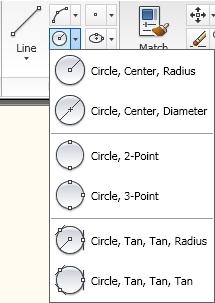
 Likewise, the Circle command button provides access to the different ways you can create a circle, with the initial icon running the Center, Radius option.
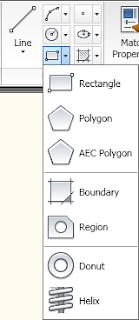
 The Rectangle command button runs the Rectang command from the initial icon and also gives access to the Polygon, AecPolygonAdd, Boundary, Region, Donut and Helix commands.
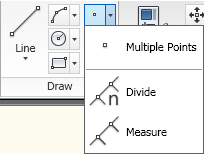
 The Multiple Point command button provides access to the Point, Divide and Measure commands.
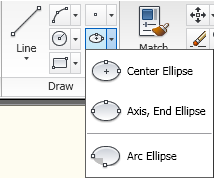
 The Center Ellipse command button provides access to the Ellipse command, with the center option chosen, the Ellipse command and the Ellipse command, Arc option chosen.
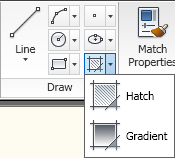
 The final command button on the Draw Panel gives access to the Bhatch and Gradient commands.
 Modify Panel
The Modify Panel has a number of object modification commands, including a number on the panel flyout which are accessed by selecting the panel name. The "pin" that displays at the left end of the panel name when the flyout is displayed can be selected to pin the flyout in the open position.
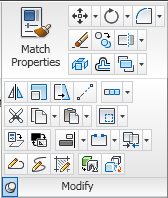 The featured Match Properties icon runs the MatchProp command. The smaller icons, starting at the top and running left-to-right, row by row, allow you to run [Row 1] the Move/3dmove, Rotate/3drotate, Fillet/Chamfer, [Row 2] Erase, Copy, LineworkTrim/Trim/LineworkExtend/Extend (the "Linework" variants are the AEC enhanced commands), [Row 3] Explode, Offset, DrawOrder (Bring to Front, Send to Back, Bring Above Objects and Send Under Objects), [Row 4, on flyout] Mirror, Scale, Stretch, Lengthen, LineworkArray/Array/3darray, [Row 5] Cut, CopyClip/CopyBase/CopyLink, PasteClip/PasteBlock/PasteAsHyperlink/PasteOrig/PasteSpec, LineworkObscure/LineworkCrop, [Row 6]SetByLayer, Chspace, Align/RepositionFrom/LineworkSpaceEvenly/LineworkCenter/LineworkDivide, Break/Break at Point/Join, LineworkMerge/LineworkSubtract, [Row 7] Pedit/SplineEdit/HatchEdit/MassElementConvert/ConvertTo3DSolids
Layers Panel
The Layers Panel collects all layer-related commands. The top row features command buttons for the Layer, Layiso, Layuniso, Layfrz, Layoff (an unfortunate command name, given the current state of the global economy), Laymch, Layerp, and Laymcur commands. The button on the second row displays the name of the current Layer State, and when the flyout is activated, allows you to select from a list of defined layer states, create a new layer state or manage layer states. The button on the third row displays the equivalent of the layer dropdown from the former layer toolbar. New in 2010, you can now click on the color swatch and change the color of a layer directly from here, without the need to open the Layer Properties Manager.
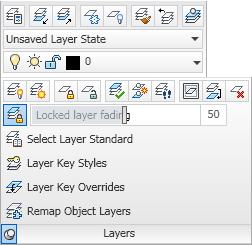 The fourth row (first row of the flyout) has command buttons for the Layon, Laythw, Laylck, Layulk, Laycur, CopyToLayer, Laywalk, Layvpi (freezes a layer in all other viewports), Laymrg and Laydel commands. The fifth row has command buttons that allow you to toggle locked layer fading on and off and set the amount of fading of locked layers when turned on. The sixth row runs the AecDwgLayerSetup command, opening the Drawing Setup dialog to the Layering tab. The seventh row opens the Style Manager, filtered for Layer Key Styles. The eighth row opens the Layer Key Overrides dialog, allowing you to set a Layer Key Style current, set overrides on the fields defined in the Layer Standard associated with that Layer Key Style and enable/disable all Layer Key Overrides. The ninth row runs the RemapLayers command, which will put selected AEC objects back on the layer associated with the Layer Key assigned to that object type.
Annotation Panel
The featured Text icon on the Annotation Panel runs the Mtext command. The first row command buttons give access to assorted AEC Dimension and AutoCAD Dimension commands and AnnoRevisionCloudAdd/MaskAdd/Wipeout. The second row contains command buttons for Mleader/AIMleaderEditAdd/AIMleaderEditRemove/MleaderAlign/MleaderCollect and various reference/sheet keynoting and keynote legend choices. The third row allows you to add a number of Schedule Tags (these are linked to the ones available in the tool palettes; I believe these can be customized to tags present in your own tool palettes) and the DefineTag command and add various Schedule Tables (again, linked to those in the tool palettes)/open Style Manager filtered for Schedule Table Styles and add an AutoCAD table.
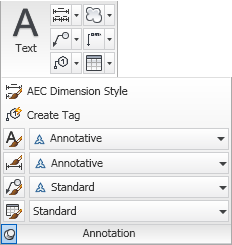 The fourth row (first in the flyout) opens the Style Manager, filtered for AEC Dimension Styles. The fifth row offers another location to run the DefineTag command. The sixth row gives access to the Style command, with a dropdown list to set the current text style. The seventh, eighth and ninth rows do the same for dimension styles, multileader styles and AutoCAD table styles.
Inquiry Panel
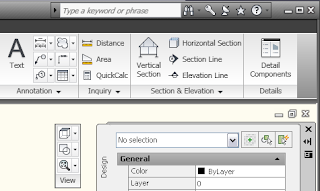
The Inquiry Panel provides access to the Distance option of the MeasureGeom command (which seems so much more cumbersome than the good old Dist command, although it does have fancier on-screen graphics), the Area option of the MeasureGeom command (similar comment with respect to the Area command), the QuickCalc command
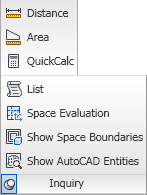 and, in the flyout, the List, SpaceEvalutation, SpaceShowBoundingObjects and VisualAudit commands.
Section & Elevation Panel
The Section & Elevation Panel has command buttons for the VerticalSection, HorizontalSection, BldgSectionLineAdd and BldgElevationLineAdd commands
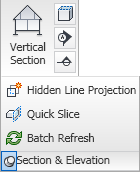 and, in the flyout, the CreateHLR, QuickSlice and RefeshSectionsElevations commands.
Details Panel
The Details Panel has a single command button for the DtlCompManager command, which opens the Detail Component Manager dialog.
 View Panel
The View Panel has three flyouts, the View flyout,
 the Visual Styles flyout
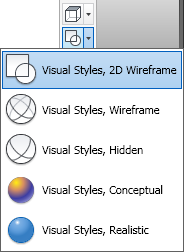 and the Zoom flyout.
 These should be familiar as there were formerly toolbars for each of these.
The frequency with which I use these commands leads me to believe that I will usually "tear off" this panel and leave it as a floating panel.
 A panel can be torn off by selecting the panel title and, while holding down the left mouse button, dragging it off of the Ribbon. Doing so will make it available at all times, even when another Ribbon tab is current. If you hover over the torn-off panel, it will "grow wings".
 The left side provides a place to grab and move the panel (you can also do so by selecting and holding down the left button on the panel title). The right side has two icons; the top one will return the panel to the Ribbon, the other will toggle the orientation of the panel/title from horizontal to vertical.
No comments:
Post a Comment