July 28, 2007

AutoCAD Architecture 2008 as AutoCAD

Although I rarely use the option, as I was installing AutoCAD® Architecture 2008 the other evening, I thought I was carefully making my way through the installation process and was surprised that there was not an unchecked toggle somewhere to add a desktop icon to run the program as AutoCAD®. I went back to modify the installation and still could not find that option, which had been there in the last few releases.

I was not too worried, having remembered that Matt Dillon had posted an article in his blog giving a method of creating such a shortcut without the need to go into the installation program. I opened up the program and after getting through the authorization process, opened up the Options dialog to begin making my usual changes to the out-of-the-box settings. While there, I noticed that a profile called "AutoCAD" had been created and found that profile was set up to run AutoCAD Architecture (ACD-A) "as AutoCAD". (And, yes, I did install all of the content options. Someday when I have some "extra" time, I will see whether there is any cool stuff in the content for countries other than the US.)
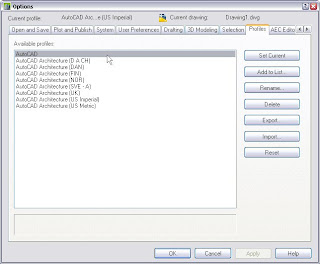
Rather than creating a shortcut that calls a previously undefined profile, as Matt suggested for the 2007 release, I chose to make use of the AutoCAD profile that was already there. The following outlines what I did. The first step was to find the icon of the shortcut I would normally use to start ACD-A 2008, right click, copy and then paste a copy on the desktop.
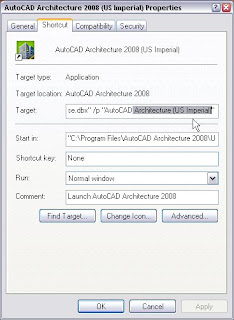
I then right clicked on the copied shortcut and selected Properties from the context menu. On the Shortcut tab, in the Target edit box, after the "/p" switch, I changed the name of the profile to be used when launching ACD-A to "AutoCAD".Then, since my desktop has quite a few ADT/ACD-A shortcuts, I edited the comment, which is the text that appears in the tool tip when hovering over a desktop shortcut, to reflect the function of this shortcut, as shown in the image below.
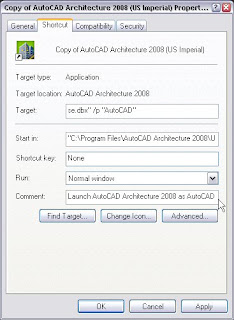
I also wanted to give this shortcut a distinctive icon, one my aging eyes would have no trouble distinguishing, so I selected the Change Icon... button, which opened a "Change Icon" dialog showing the current icon as the only choice. A click on the Browse... button in that dialog opened another "Change Icon" dialog that would allow selecting a different source file for the icon, starting in the folder in which the current icon's source file was located.Fortunately, the vanilla AutoCAD icon was also in that folder, and I chose that file and accepted that as the new icon.

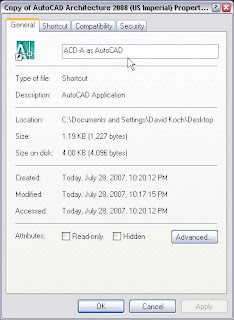
The final step was to select the General tab and change the name of the shortcut, as seen below.I chose OK to dismiss the Properties dialog and I now have a desktop shortcut that will launch ACD-A 2008 as AutoCAD.
July 25, 2007

Pasting Formulas

Perhaps you have found the code for a formula property in a posting in an Autodesk Discussion Group or an AUGI Forum, and you wanted to add that formula to a Property Set Definition of your own. Someone else has already done all of the typing - why not just cut and paste the code and move on to your next task? Even if you already had - or just created - all of the other properties referenced by the sample code, you will find that cutting and pasting code from another source does not work. That is because property references have to be created by selecting them from the pane below the formula editing pane; you can not simply type in the name of the property, enclosed in square brackets: [MyPropertyReference]. Cut and paste will not work even if the source is another formula property, that has working property references!
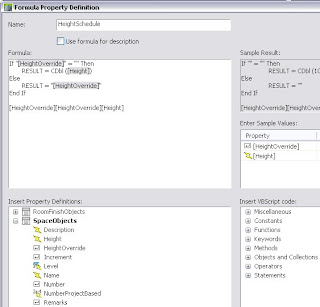
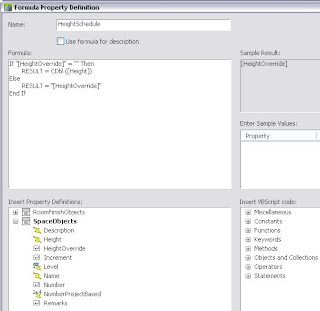
The image above shows a formula property being edited, with text cut from Notepad and pasted into the edit pane. As you can see, the property references (text enclosed in square brackets) do not have the tell-tale gray background of a working property reference. (For ADT 2004 and 2005, the working property references appear in bold type.) After pasting, you could individually highlight each property reference and then double click on the corresponding property in the lower pane to replace the text with a working reference. In my simple example, that would only require three operations and would not be all that onerous. But for a more complex formula, there could be many more references, and the chore more tedious.

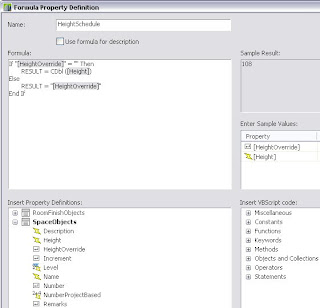
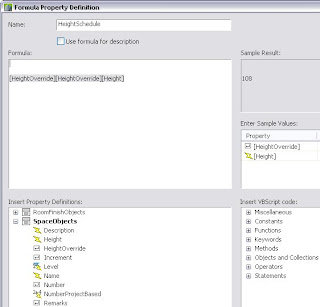
Fortunately, there is an alternative. You will need to scan through the code you intend to paste and identify all of the property references, but you would have to do that anyway, to make certain that all of those properties already existed. Keep a count of how many times each property is referenced. (If any one property is referenced more than two times, you may want to consider setting a variable to the value of that property up front, then using the variable in lieu of reading in the value multiple times.) As shown in the image below, add the property references in the code you intend to paste, one reference for each reference in the code, by double-clicking on the corresponding property in the lower pane. The sample code references the [HeightOverride] property twice and the [Height] property once, so that is what was added. Note the gray background behind the property references.
Now position the cursor before/above the property references you added. I like to throw a blank line or two before the references to be certain I am above them, and to make the final cleanup that much easier. Paste your code into the edit window and "presto-chango" - the code reference text you pasted in is now magically transformed into working code references, and the code references added prior to pasting are now plain text, as seen below.
All that remains is to highlight the extra lines and now useless text at the end of the formula and delete it.
Note: If the names of the properties in the code to be pasted are different from the equivalent properties in your Property Sets, you will need to paste the code to Notepad or a similar program and edit the name text to match your names before pasting it into the formula property, or this technique will not work.

July 01, 2007

Anchor Property Sample

In response to a question in the Schedule PSD thread in the AutoCAD Architecture 2008 Discussion Group, I posted a file done in ADT 2007 that demonstrates that an Anchor property can be used in a Property Set Definition attached to to a Window object to read in property data from the Wall object and use that to calculate the necessary window opening.

Two different options are given, one that assumes a style-naming convention that has the name of all stud wall styles starting with the letters "stud", and another that assumes that a manual property attached to the wall style contains the string "STUD" for all stud walls. The formulas associated with each method pass through the value of the automatic WidthUnformatted property for stud walls and add 3" to the width for all other wall types.

Use of a Anchor property, introduced in the 2007 release, makes this task much easier. Previous releases would have required a formula property to dig through the drawing database, to find the associated value.