Using a Tool to Change the Layer – Alternate Layer Key
If you need different layer settings for your alternate wall layer, and you do not want to include the layer in your template file or rely on the end user remembering to run a script or standards check, you can add a new Layer Key, with the desired layer settings, to your Layer Key Style, then set up a wall tool that uses the new Layer Key.
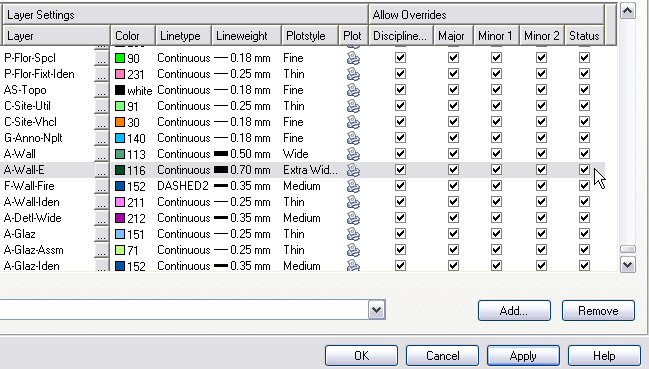
- First, decide the layer name and the attributes you wish to assign to that layer. In keeping with the example from the previous installment, the example here will set up a layer named A-Wall-E for use by existing-to-remain walls. The following attributes will be assigned:
- Color: 116
- Linetype: Continuous
- Lineweight: 0.70 mm
- Plotstyle: Extra Wide Screened
- Plot: Yes
- Allow Overrides: Yes for all
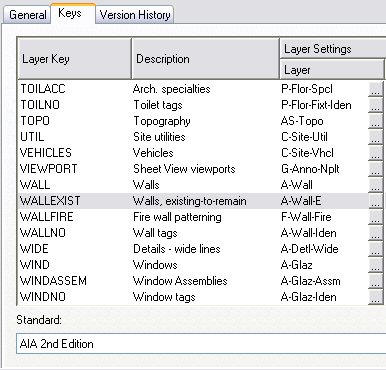
- You will also need to select a name and description for your new Layer Key. For our example, WALLEXIST and “Walls, existing-to-remain” will do. As before, I would recommend working on a renamed copy of your Layer Key Style in a local file while making your edits and only copying it back to your Auto-Import file [see the first article for more on that] once you are satisfied it works. Open the Style Manager, make a copy of the Layer Key Style if desired, and edit the style. On the Keys tab, select the Add… button and enter the name of your new Layer Key in the Name dialog box.
- Scroll in the Keys tab, if needed, to find your newly added key. Left click in the Description column next to your key and add your description.
- If your layer name can be built from predefined values for the various Descriptive Components, you can click on the ellipsis button [“…”] and use the Layer Name dialog to build your layer name. In the Layer Name dialog, select the ellipsis button next to each Field to choose from a list of pre-specified values for that field. Otherwise, you can click in the Layer column and type in the layer name.
- Enter the layer parameters for your new Layer Key. You will notice that the Allow Overrides toggles are grayed out. In 2006, click on the Apply button to “register” the new key and enable the toggles. In 2004 and 2005, you will need to select OK, then edit the Layer Key Style again to enable the toggles. OK out to the drawing, and save the drawing file.
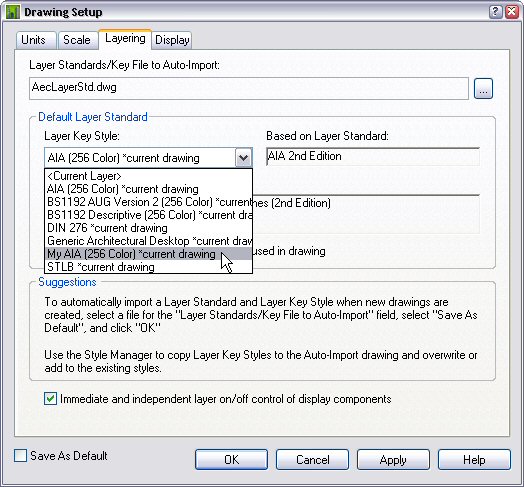
- Set your new Layer Key Style current, by opening the Drawing Setup dialog [one way is to select Format > Drawing Setup… from the pulldown menus] and selecting the Layering tab. In the Default Layer Standard area, choose your new Layer Key Style from the Layer Key Style dropdown list. Select OK to set that style current.
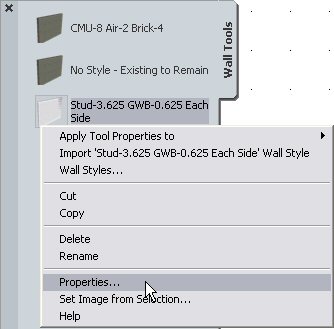
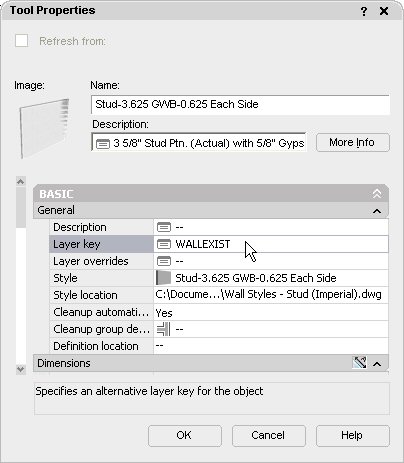
- Now that you have created a new Layer Key, you need to make use of it. On an editable Tool palette, create a wall tool that references a style that you would like to have placed on your alternate layer. Right click on the tool, and choose Properties… from the context menu.
- In the Basic category, General subcategory, the second property is “Layer key”.
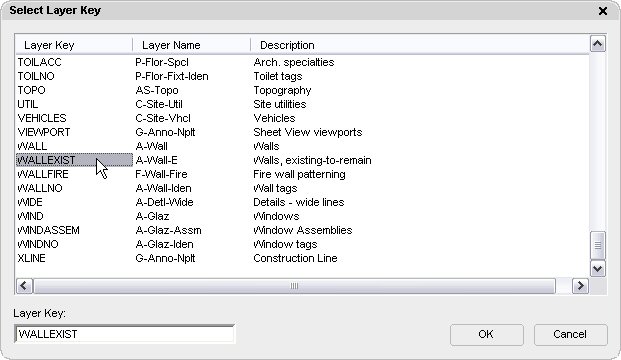
 Left click on the worksheet icon to the right of the Layer key property name to open the Select Layer Key Dialog, which will display a list of the Layer Keys in the current Layer Key Style, along with the layer names and descriptions assigned to each key. Scroll down, if necessary, to find your new Layer Key on the list and select it. The Layer Key Name will appear in the Layer Key edit box at the bottom of the dialog. You can, if you like, also type the name directly into the edit box, but be aware that any entry will be accepted, so if you want to be certain you specify a Layer Key that exists in the current Layer Key Style, find and select the Layer Key from the list. When the desired Layer Key is displayed in the Layer Key edit box, select OK to return to the Tool Properties dialog.
 - Note that your new Layer Key has been assigned to the tool. Select OK to accept the change and close the Tool Properties dialog
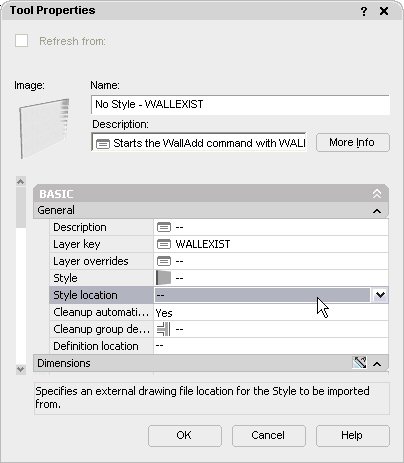
- As with the Layer Override tool, if you expect to have many different walls styles using your new layer key, you may not want to create second set of tools that use this key. [For the current example, if you display components in your plans, you may want to have parallel styles for existing-to-remain walls so that you can assign Material Definitions that display as proper existing walls – even if that means turning off the components. In that case, you would need a new tool for each new style.] You can create a generic wall tool, with no style or style source assigned, then use that tool to start the WallAdd command, choosing a style on the Properties palette, or right click on the tool and choose Apply Tool Properties to > Wall to move a previously drawn wall to the layer specified by the Layer Key set in the wall tool.


That wraps up this series on putting walls on the layer on which you want them. If you still have questions, a good place to get an answer is in the Autodesk Architectural Desktop Discussion Groups.
No comments:
Post a Comment