CAUTION: If you are just experimenting, make the changes to a local file. Do not change the office-standard settings in your Auto-Import file unless you have the authority to make changes for your office.
This all started out as a single article, but grew in length to the point where I thought it best to split it up into three, more manageable segments. These tutorials, and their images, were created using Autodesk Architectural Desktop 2006. The procedures noted should apply to the 2004 and 2005 releases as well, although I did not run through them in those versions to see if there were any minor differences in behavior.
Changing the Layer Assigned to A Layer Key
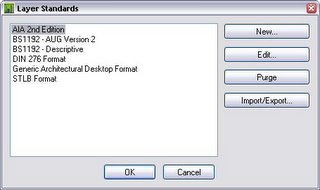
The first case is fairly straightforward. The first thing you would want to look at is whether you are using the correct Layer Key Style. Autodesk Architectural Desktop ships with several Layer Standards, each of which has an associated Layer Key Style.


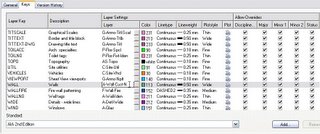
You can find these in the AecLayerStd.dwg file, which is located in the C:\Documents and Settings\All Users\Application Data\Autodesk\ADT 2006\enu\Layers folder if you use the default locations for content. The location for your setup may be different; check with your CAD Manager. Take a look at the various standards and find the one that most closely matches the layering you use. Setting up an entirely new Layer Standard is beyond the scope of this article; I will assume that one of the out-of-the-box Layer Standards and its associated Layer Key Style is close to what you need, but you want to change the layer name for the WALL key. Use the Style Manager to make a copy of the Layer Key Style and give it a different name, then edit that style and, on the Keys tab, you can change the name and layer settings for the WALL layer key, and others, as well.

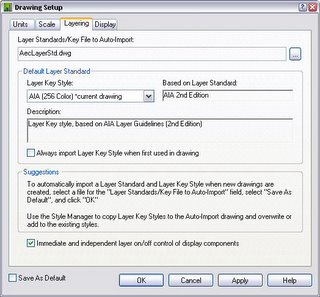
Once you have the Layer Key Style set up the way you want in a local file on your machine, you may decide that you would like that to be your [or your office’s] standard Layer Key Style, to be used in all drawings. You will want to copy your new Layer Key Style to the AecLayerStd.dwg, or whatever file you have set up as your Auto-Import file for Layer Standard/Layer Key on the Layering tab of the Drawing Setup dialog. If you are not going to use one of the out-of-the-box Layer Key Styles “as is”, I would recommend setting up your own, separate file for holding your layer standards, to make it easy to back up and migrate to later releases. Your custom file can be in the same folder as the AecLayerStd.dwg, just point to that file as your Auto-Import file on the Layering tab, then select your new Layer Key Style as the Default Layer Standard. If you want that to be the default setting for future drawings opened on that computer, check the Save As Default toggle in the lower left before clicking OK. [You may want to check the settings on the Units and Scale tabs, to make certain they are set to your desired default values before clicking OK.]

Click on any image to see a larger version. Stay tuned for the next installment, which will cover setting up a wall tool with a Layer Key Override.
No comments:
Post a Comment