The Wall Style Components Browser allows you to easily add components to a wall style that match the way that component is set up in another style. That can help you maintain consistency across all of your wall styles. Ordinarily, when creating a new wall style, I would suggest starting with a copy of the existing wall style that is closest to what your new wall style needs to be, but for the purposes of illustration, I will create this one from scratch. The partition type I need is an interior metal stud partition that has good acoustic properties as well as a three-hour fire-resistance rating. The image below, taken from the USG Acoustical Assemblies catalog SA200, shows the partition we want to create

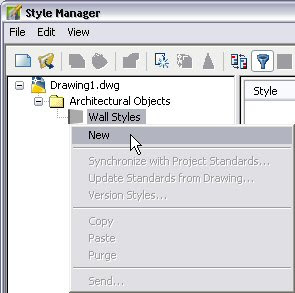
- Start a new drawing using an Autodesk Architectural Desktop template file. I am using the 2007 release for this exercise, and started with the out-of-the-box Aec model (imperial stb).dwt template. Open the Style Manager (one way, Format > Style Manager… from the pulldown menus). Expand the Architectural Objects folder under your new drawing in the left pane, right click on Wall Styles and choose New from the context menu.
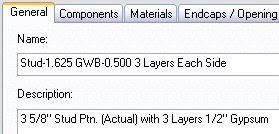
- Give the new wall style a name, I chose Stud-1.625 GWB-0.500 3 Layers Each Side to match the out-of-the-box style-naming convention. In the right pane, select the General tab and add a description of 3 5/8" Stud Ptn. (Actual) with 3 Layers 1/2" Gypsum, again matching the format of the shipping content. If your office has a different convention, by all means follow that.
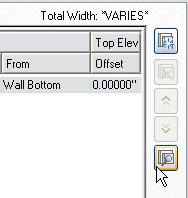
- Select the Components tab. You should have a default component, called "Unnamed". We will be deleting that later, but only after we add another component, as you always need to have at least one component. Click on the Wall Style Components Browser button [the tool tag reads "Wall Style Browser"], the bottom button of the four at the right side of the Components tab.
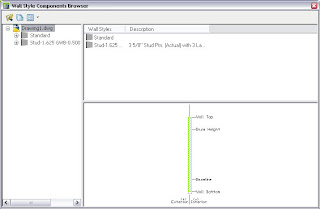
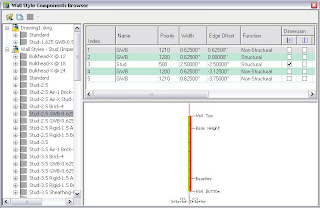
- The Wall Style Components Browser window opens.
- None of the wall styles in the 2007 version of that file have a half-inch thick GWB component or a 1 5/8" deep stud, but we can bring in a 5/8" thick GWB component and a 2 1/2" stud and modify them. I chose the Stud-2.5 GWB-0.625 2 Layers Each Side wall style. Clicking on this in the left pane displays the components in that wall style and their properties in the top right pane, and a preview of the wall style in the lower right pane.
- Select the Index 1 GWB component in the top right pane, right click and choose Copy from the context menu.
- Now we can delete the Unnamed component, by selecting it and clicking on the Remove Component button, second from the top at the left. Edit the GWB component, changing the Priority to 1220 (remember, we have three layers of GWB each side), the Width to 1/2" and the edge offset to 1". Select the edited component, right click, choose Copy from the context menu and finally right click and choose Paste from the context menu, twice, to add two more GWB components. Edit the Index 2 component, changing its Priority to 1210 and Edge Offset to 1/2". Edit the Index 3 component, changing the Priority to 1200 and Edge Offset to 0".
- Go back to the Wall Style Component Browser and copy the Stud component and paste it into the Components tab. Change the Width to 1 5/8" and the Edge Offset to -1 5/8".
- We are in the home stretch now. Select the Index 3 GWB component, right click, Copy, select the Index 4 Stud component, and then right click and Paste. Change the Edge Offset of the Index 5 GWB component to -2 1/8". Select the Index 2 GWB component, right click, Copy, select the Index 5 GWB component, right click and Paste. Change the Edge Offset of the Index 6 GWB component to -2 5/8". Select the Index 1 GWB component, right click, Copy, select the Index 6 GWB component, right click and Paste. Change the Edge Offset of the Index 7 GWB component to -3 1/8".
 There is not much to pick from at this point, since there are no other wall styles in our drawing. We could have used the Style Manager to copy some other styles into our file first, but if we do not need them, why clutter the file with them? Just as you can "open" a file in the Style Manager without actually opening the file, you can "open" a file in the Wall Style Component Browser and access the styles within. Click on the Open drawing icon at the upper left corner, then browse to the location of the file containing the wall style(s) from which you want to copy components. I chose the out-of-the-box Wall Styles – Stud (Imperial).dwg as the source file.
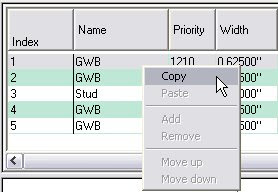 Now click back in the Style Manager to make that the active window, right click in the right pane under the default component and select paste from the context menu.
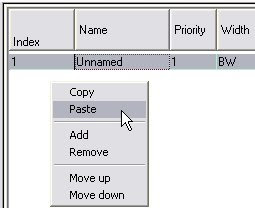 This will paste the component you copied in the Wall Style Component Browser into your wall style, with the same properties as it had in the source style. If you like, click on the Materials tab and note that the Material Definition assigned to the copied GWB component was also brought along into our style. Not too shabby for a single cut and paste.


 By taking advantage of the Wall Style Component Browser, we were able to build a new wall style that matches the settings in existing wall styles with a few simple Copy and Pastes. How much easier could it be?
1 comment:
So glad I found your blog. Already made much use of the override formula property...
For quite some time I have been investigating if there is a way to read the materials of a certain wall style. I would like to apply a MV-Block to walls in order to label the wall's surface material (exposed concrete, paint, plaster, wallpaper and so on).
So far I was not able to transfer the information in the wall style manager into a plain property field in order to read it through the mv-block.
I tried to make use of the detail components as well as of the material property field (where I was only able to select the unnamed material and some "outer edge" material, but not user defined ones).
any ideas would be appreciated! tnx
Post a Comment