To demonstrate the grip editing feature, I have created a square, non-associative hatch (and deleted the original bounding polyline), and drawn another polyline, to which I will extend the hatch, using grip edits.
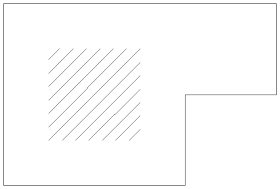
Selecting the hatch reveals a number of grips. The center grip allows you to move the entire hatch, and was present in releases previous to 2010. The Vertex and Edge grips are new in 2010 (and are also present in 2011). ACA users should be familiar with hovering the cursor over a grip to get a tooltip, possibly listing options, and that technique works here as well.
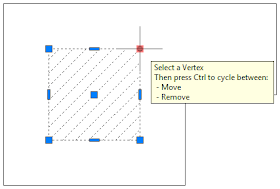 Hovering over a square grip at the perimeter of the hatch (Vertex) reveals that selecting that grip will allow you to initially move the Vertex to a new location, and pressing the CTRL key will cycle to the Remove option, allowing you to delete the Vertex.
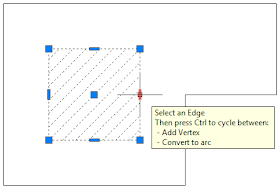 Hovering over a rectangular Edge grip on a straight segment at the hatch perimeter shows that the intial action on selecting the grip will be to add a new Vertex, and that pressing the CTRL key will cycle to converting that Edge to an arc.
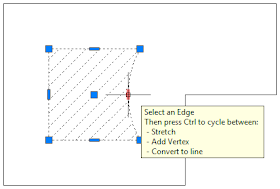 Hovering over the rectangular grip of an arc Edge of a hatch indicates that the initial action is to stretch the arc and that you can use the CTRL key to cycle to add a new Vertex and then to convert the arc to a line.
ACA users that have used grip edits on AEC objects will have to remind themselves that the Edge grips can NOT be used to stretch a straight segement, as they can for AEC Polygons.
To make the square hatch fill the drawn polyline with grip editing, use the Move option to relocate the four existing Vertices to Vertices on the polyline.
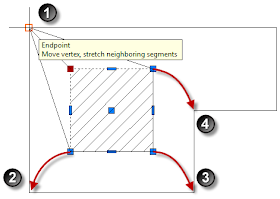 To fill in the remainder, select the Edge grip that is not on a segment of the polyline and use the Add Vertex mode to add a fifth...
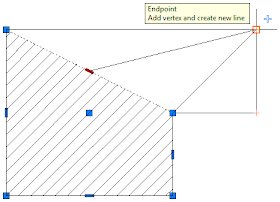 ...and sixth Vertex...
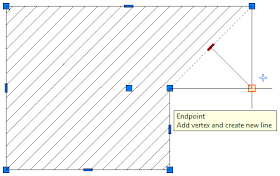 ...filling the polyline.
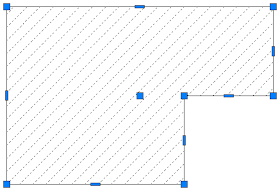
You can, of course, accomplish this simple edit in one step, by selecting the original square hatch, right clicking, choosing Set Boundary from the context menu and then picking the polyline.
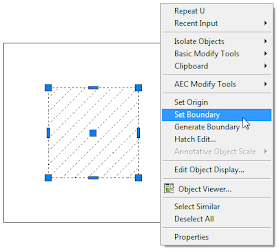 But in a typical drawing, where you have a lot more linework and, perhaps, several adjoining hatches, and where the linework defining the hatch edges is not a single polyline, I have found grip editing of hatches to be a very useful feature, and one that has virtually eliminated the need to delete an existing hatch and then rehatch the area.
I have been having a problem with this feature. Every time I move a grip autocad is creating a modified copy of the hatch over the top of itself. So if I move a vertex of a hatch pattern and delete it it would still be there because it is creating two of them. It seems to leave the original and make a copy with the new changes to it. I was wondering if you had run into this problem?
ReplyDeleteThanks,
Spencer
I have not experienced that problem. You could tell ACA to make a copy after making a grip hot by typing a "C" and then pressing ENTER or hitting the Space Bar, but I assume that you are not doing that.
ReplyDelete